
Escape room automation is the process of connecting and controlling puzzles, lights, locks, sensors, and audio or video cues through centralized software. It allows your game to run smoothly without constant manual intervention, creating a more immersive and reliable player experience.
Designing and opening an escape room is an exciting creative journey. You start with a story, then build puzzles, rooms, and technical systems that bring it to life. But between the first idea and the grand opening lies one of the biggest challenges: automation. Making sure that your locks, lighting, sounds, and puzzles all work in perfect sync is what transforms a good escape room into a great one.
This guide walks you through each step of automating your escape room, from concept to completion, so your technical setup enhances the story instead of getting in the way.
Step 1: Define the Player Experience
Before diving into technology, start with what really matters: how players will feel. What theme will your escape room have? Do you want tension, curiosity, or excitement? Automation should serve those emotions.
Sketch out your room’s flow. Note when puzzles trigger story events, where lights should react, and when sound effects or screens will help move the game forward. Identify key emotional moments where automation can heighten immersion, such as lights fading when a secret door opens or music building as time runs out.
A clear emotional and narrative plan makes your later escape room automation decisions far easier.
Step 2: Map Out Your Puzzle Logic In Advance
Every escape room can be expressed as a system of inputs and outputs. An input might be a button, RFID reader, pressure sensor, or magnetic switch. An output might be a lock release, a light turning on, or a sound effect.
Before you start wiring, create a logic diagram that shows how everything connects. For example:
- When all three crystal pedestals are activated, unlock the hidden door.
- Solving the keypad puzzle displays a video hint on the main monitor.
- Opening the drawer triggers a sound cue in the hallway.
This logical mapping prevents overlaps or conflicts later and gives you a clear overview when you begin programming your automation software.
Step 3: Choose an Escape Room Automation System
One of the most important choices you’ll make is how to control your devices. Some creators build their own setups from microcontrollers, while others use integrated systems like Realix ERC.
A centralized control system allows you to manage all devices through one interface, simplifying installation and maintenance. Instead of writing code for every microcontroller, you connect your props, lights, and sensors to a main controller and define the game logic visually.
This approach saves time, reduces complexity, and enables multi-room synchronization with ease. You can control everything from fog machines and lighting to background music and video without deep programming knowledge.
When selecting your control hardware, look for reliability and modularity. Escape rooms operate daily under stress, and hardware failures do happen. Using plug-and-play modules makes replacements quick and painless. A damaged unit can be swapped in minutes, keeping your room running smoothly without downtime or rewiring.
Step 4: Plan Your Control Hardware Layout
Good hardware planning prevents chaos later. Draw out where each controller, power supply, and cable will go before installation.
- Separate low-voltage devices (like sensors and LEDs) from mains power equipment.
- Use structured cabling such as RJ12 or RJ45 for clean, consistent wiring.
- Label every cable and component for easier troubleshooting.
- Mount controllers on DIN rails or panels in an accessible cabinet.
Also, think about maintenance. Components that may need replacement, like relays or sensors, should be easy to reach. Modular plug-and-play hardware means you can unplug a faulty unit and install a new one without needing to reprogram or rebuild your wiring.
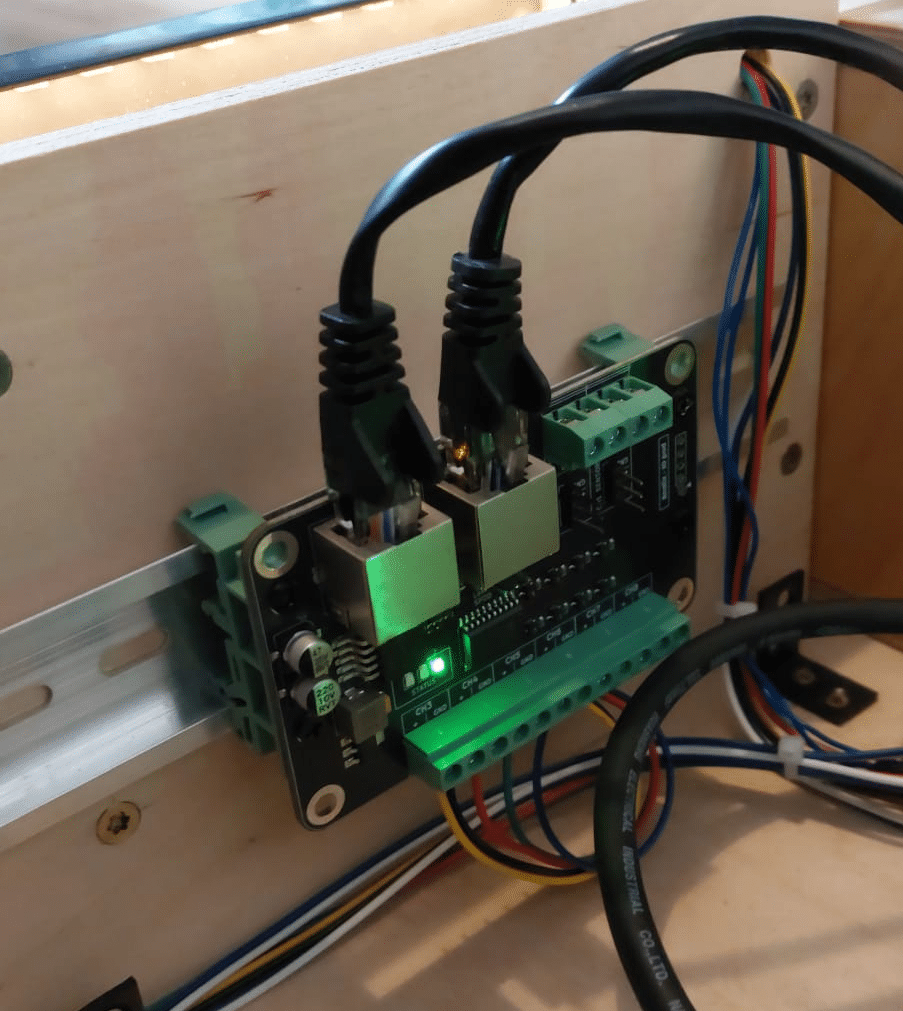
Using modular, DIN-rail mounted control hardware keeps your escape room automation tidy, reliable, and professional. Each module connects through a plug-and-play system, so if one ever fails, you can replace it within minutes and get your room running again. This approach minimizes downtime and makes maintaining your escape room automation simple and stress-free.
This picture shows one of the control pods from Realix ERC escape room automation software which follows this exact principle.
Step 5: Build and Test Each Prop
Before connecting everything together, test props individually. It’s easier to isolate problems early.
As you build each puzzle, connect it to your control system and check that it triggers the correct response every time. Stress test components: buttons should handle hundreds of presses, sensors should not misfire, and magnets should consistently release.
Once each prop is reliable, integrate it into the full system.
Step 6: Integrate Audio, Lighting, and Video Effects
Atmosphere is what makes escape room automation shine. Coordinating light, sound, and visuals transforms gameplay into a cinematic experience.
Create layered effects: when the final puzzle is solved, lights can fade, a victory sound plays, and a message appears on screen. With centralised escape room automation, you can synchronize these perfectly.
Don’t forget background immersion: ambient sounds, lighting that reacts to progress, or subtle video hints. These elements make your world feel alive and responsive.
Step 7: Configure and Simulate Your Game Logic
Once the hardware is installed, program the game flow using your escape room automation software. A visual logic designer makes this easy:
“If the correct RFID card is scanned, unlock the safe, play ‘open.wav,’ and set the room lights to blue.”
“If the correct code is entered on the keypad, disable the magnetic lock and flash the corridor lights twice.”
“If a wrong button sequence is pressed three times, reset the puzzle and show a hint message.”
“When the door to the lab is opened, play an ambient sound track and enable the lightning one by one”
Run simulations before the first playtest. This lets you verify sequences, catch timing issues, and adjust difficulty or pacing without physical changes. Most escape room automation software support testing individual effects and events.
Step 8: Add Monitoring and Safety Controls
Even the best escape room automation systems need manual control options. Add an operator interface that allows staff to skip puzzles, reset props, or trigger effects manually.
Include features like:
- Real-time device monitoring
- Manual override buttons
- Event logging for troubleshooting
Add surge protection and consider backup power. A short power loss shouldn’t reset your room’s progress.
Step 9: Conduct Full Playtests
After all components are integrated, invite test groups to play the full experience. Observe where players struggle, how quickly they progress, and whether automated moments trigger at the right time.
Adjust puzzle timing and effect pacing as needed. Playtesting also helps uncover rare bugs, such as puzzles that trigger twice or props that need resetting after partial activation.
Step 10: Document, Train, and Open Your Doors
Before launch, document your entire setup: wiring diagrams, control IDs, and logic flowcharts. This documentation is invaluable for troubleshooting and future upgrades.
Train your staff thoroughly. They should know how to monitor the game, override triggers, and reset the system. Make sure they understand the escape room automation or choose intuitive software.
Once everything runs reliably, you’re ready to welcome your first teams.
Escape Room Automation Checklist
To summarize:
- Define your desired player experience
- Map puzzle logic before wiring
- Choose a centralized automation system
- Use modular, plug-and-play control hardware
- Plan clear, labeled wiring layouts
- Test props individually
- Synchronize lighting, sound, and video
- Add monitoring and manual controls
- Run full playtests
- Document everything before opening
Conclusion
Escape room automation might seem technical, but with a clear plan it becomes manageable and rewarding. Start with the story, design your puzzle flow carefully, and choose reliable plug-and-play control hardware that can be replaced easily when needed.
Whether you use custom electronics or a centralized system like Realix ERC, the goal is the same: to create an immersive, smooth-running experience where players never see the technical effort behind the magic.