
The Realix Media Box is not really a physical box, but a software application that uses a browser to play video and audio, display text and images, and also is able receive user input when a touchscreen is used. It is still called a box because it is connected in the same way as the SBUS and DMX boxes.
How the Media Box Works
- The Box application, which runs on a Windows PC or a Raspberry Pi, launches a browser in kiosk mode to perform the actual tasks. The browser is launched automatically when the Media Box is included in the room configuration and that configuration has been loaded by the server.
- Auto-discoverable, meaning it is automatically detected and configured in the Designer when connected.
- The page displayed in the browser is managed using the Designer. By default, it includes the following controls, which are available as device channels:
- 3 Audio Players
- 1 Video Player
- 1 Image Viewer
- 3 Text Viewers
- 1 HintViewer
- The browser page is customizable through the Designer, which allows you to add custom views, as well as outputs and inputs, to make the view interactive.
The default channels
The controls on the default web page are available as device channels. You can define corresponding objects in your configuration and link them to these channels.
Audio Player
Each audio player can play back one audio file at a time. When using the 3 available audio players, you can make one audio player for instance play a back ground music while you play effects on the other audio player. The channels are named audioPlayer1, audioPlayer2 and audioPlayer3.
Video Player
The video player is configured to play videos in full screen. However, to ensure the screen is completely filled, you should create videos with matching aspect ratios. The channel is named as videoPlayer.
Image Viewer
The image viewer is configured to show images in full screen. However, to ensure the screen is completely filled, you should create images with matching aspect ratios. The channel is named as imageViewer.
Text Viewer
There are three text viewers, each displaying text in a different location on the screen. They are named as follows: textViewer1, which displays text at the top of the screen; textViewer2, at the center; and textViewer3, at the bottom. To change their style—such as font, size, and other appearance settings—you can customize the web page.
Hint Viewer
The Hint Viewer is a special channel that includes a text viewer (center screen), a video player, an image viewer, and an audio player. It is used by the Hint system in the ERC. To activate it, you need to attach an object to the channel. You cannot define any interactions yourself with a Hint Viewer object; instead, the Hint system automatically gathers all Hint Viewer objects and sends hints—whether text, video, image, or audio—to these objects and their connected channels.
The Media Box on PC
To use the Media Box application on a Windows PC, Windows 10 or 11 is required as also Chrome needs to be installed. The browser will use the default audio device which you can easily configure in Windows.
You can find the installer on the download page. This installer gives you the option to start the Media Box automatically at login. If you want the Media Box to start when the PC powers on, you also need to enable automatic login. There are several ways to do this, but below is one solution to configure auto-start on boot:
Using the netplwiz Tool
- Press
Windows + Rto open the Run dialog. - Type
netplwizand press Enter. - In the list, select the user you want to auto log on with.
- Uncheck the box that says: “Users must enter a user name and password to use this computer.”
- Click Apply.
- You’ll be prompted to enter and confirm the user’s password.
- Click OK to save and reboot.
The Media Box on Raspberry Pi
The Media Box for Raspberry Pi is available as an image specifically for the Raspberry Pi 4. You can download the image from the download page and write it to an SD card using the Raspberry Pi Imager, available at https://www.raspberrypi.com/software/.
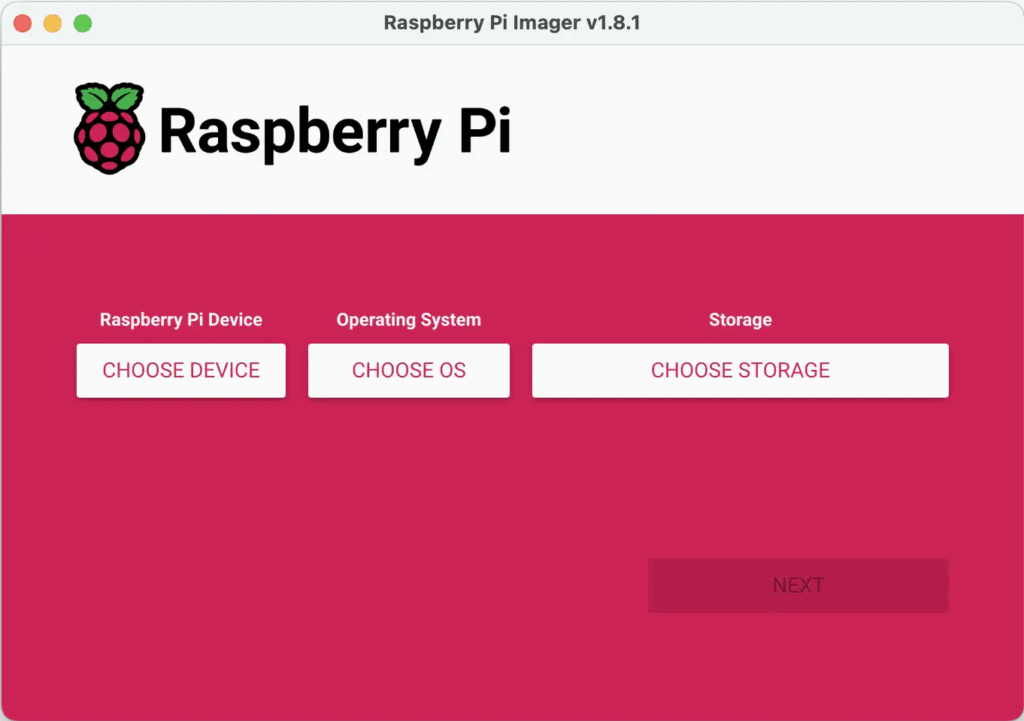
Configure the imager as follows:
- Choose Raspberry Pi Device: RaspBerry Pi 4
- Operating System: Custom, it will ask you the image to select.
- Storage: You SD-Card
After copying the image to the SD card, insert it into your Raspberry Pi 4 and power it on. The system will automatically install all necessary components for the Media Box. Make sure to connect the Raspberry Pi to your local network using an Ethernet cable.